Cloudflare搭建DDNS(docker)
本文所使用的项目地址https://github.com/oznu/docker-cloudflare-ddns
首先准备一个域名,域名可以去Freenom注册一个免费域名,目前免费域名已经不支持api了。
打开cloudflare添加你注册的这个域名
根据提示把域名的NS更换成Cloudflare的NS
在cloudflare添加一条A记录,IP随便填一个


安装 docker
快速设置:
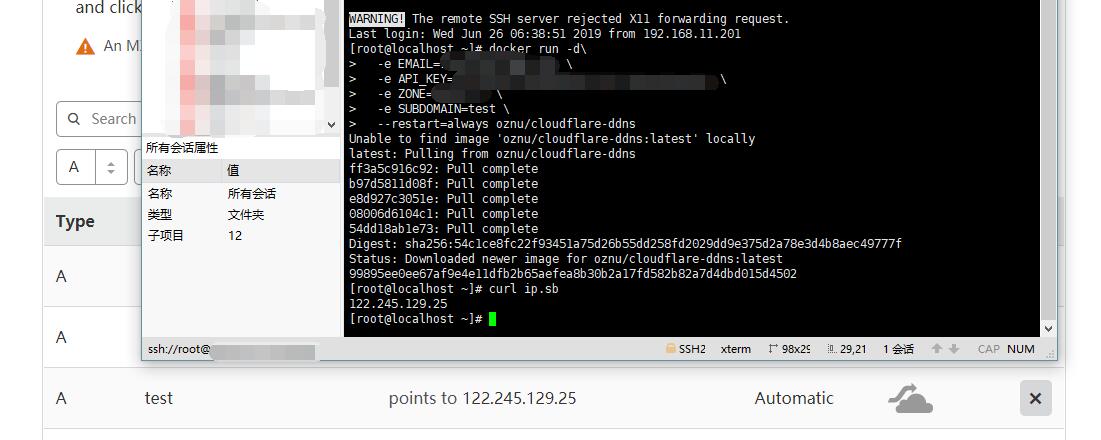
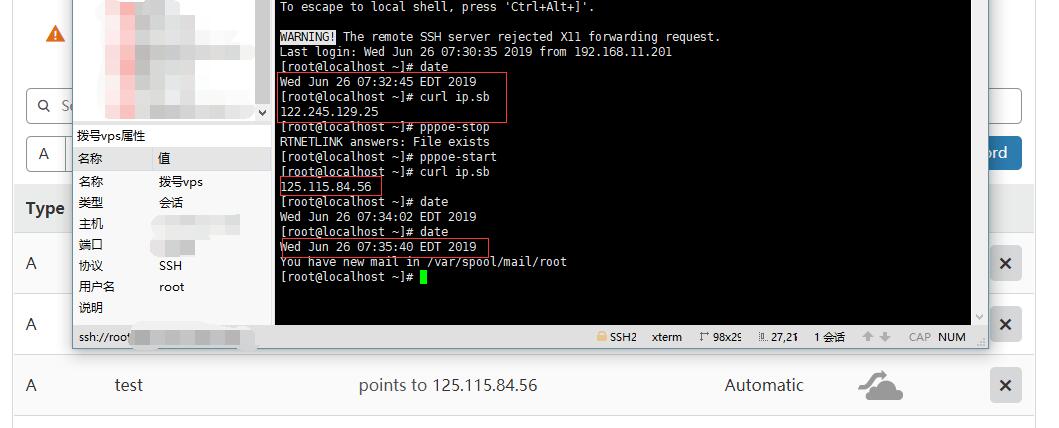
测试
首次测试

重新拨号后测试

环境变量
-e EMAIL - 你的CloudFlare电子邮件地址,使用范围API令牌时,不得设置此变量。
-e API_KEY - 您的CloudFlare Global API Key。在此处获取: API密钥获取
-e ZONE - 你的域名(一级)
-e SUBDOMAIN - 你设置的二级域名(只用填写前缀),如果未填写,将使用一级。
-e PROXIED - 设置为true使流量通过CloudFlare CDN。默认为false.
-e RRTYPE=A - 设置为AAAA使用设置IPv6记录而不是IPv4记录。默认A为IPv4记录.
-e DELETE_ON_STOP - 设置为true在容器停止时删除dns记录。默认为false
-e INTERFACE=tun0 - 设置为tun0从名为的网络接口提取IP tun0。如果未提供,则将使用公网IP。需要--network host运行参数。
使用范围API令牌
任何时候都不建议直接使用Global API Key,为了安全建议使用API Tokens
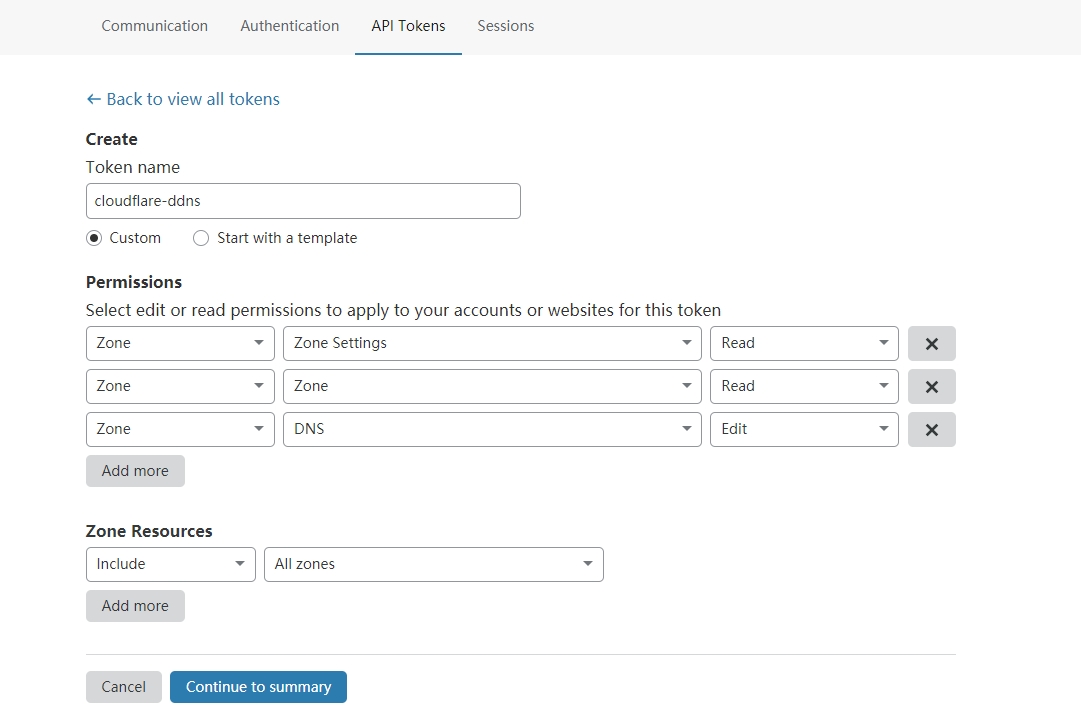
创建CloudFlare API令牌,请访问https://dash.cloudflare.com/profile/api-tokens执行以下步骤: 1. 点击Create Token创建令牌 2. 设置令牌名称,例如 cloudflare-ddns 3. 授予令牌以下权限:
Zone - Zone Settings - Read
Zone - Zone - Read
Zone - DNS - Edit
将Zone Resources设置为:
Include - All zones
完成向导并将生成的令牌复制到
API_KEY容器的变量中
如下图所示

Zone Resources可选All zones或Specific zone
最后更新于